
Why would you pluck a wig?
A wig normally looks like, well…. a wig. You put it on your head and it stays on with a small separation where the wig ends and your forehead starts. If you want to go for that all-natural look and you want your wig to replace your own hairline, you don’t want to see a cut in between your head and the wig. For that smooth transition, that thin hairline, and cute baby hair plucking your wig is great.

Pros and cons of plucking
Pros:
Natural look vs. wig look
Baby hair trend
You can wear your wig in a tight ponytail
Cons:
You can see the lace
Risk of plucking too much
Wig hair also stretches thinner even faster
Pluck a wig
You need:
Wig (of course)
Mannequin head or canvas head
Tweezer
Comb
Pins to hold your wig to the head
Before you start plucking
Take a picture of your forehead and hairline & keep that picture as a guide
The shape of anyone’s forehead is different, the shape of your head is different and the trail of the line too. In order to fit your wig seamless and as natural as your head, you want to replicate your hairline.
Note: even if your hairline is further in the back and you want to place the wig more to the front, try to keep the shape of your head as a guide.
Start with dry hair
With dry hair is easier to see how the result of your hair will be. You can see what spots have more or less hair and where you need to pluck a little more or not at all.
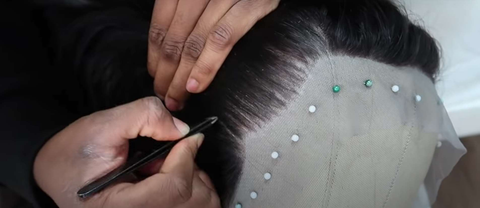
How to pluck a wig
With your free hand stretch the front hair to the back and hold it
You want to see where there are more densities and where there is less, so keeping your hair tight on the head is necessary
With the other hand pluck one area of your hair – start to replicate the shape of your hairline
The first layer you want to pluck is on the hairline – do not pluck too much, two plucks is enough.

Note: Pluck more where you want to shape your hair a little to the back and do not pluck in the middle area – because that is where the tip of your hairline comes down. Pay attention to the width of that part of your hair, because that’s the part that is different for everyone.
Take layer for layer – repeat for 4-5 layers
You’re still in one area, after you plucked the hairline – comb it out and take a small row of your hair and begin with a new layer. Pluck that layer, moving up and down so that the hair is plucked evenly.

When done with this layer, repeat for 4 to 5 times, depending on how deep you want your wig to be plucked. If you want more baby hair, you might want to pluck more layers than if you don’t.
Note: you may choose for the option to pluck your hair immediately the way you want it. You can also choose to pluck light first to estimate how much you need to pluck the second time.
Pluck the hair gradually
After step 3, you have a hairline and the first time plucking created natural frontal hair. Now pull your frontal hair to the front and pluck the rest of the hair behind that, just a little bit so that the hair will gradually flow over.
 Repeat this for all the areas of your head
Now repeat to all areas and your wig looks all-natural.
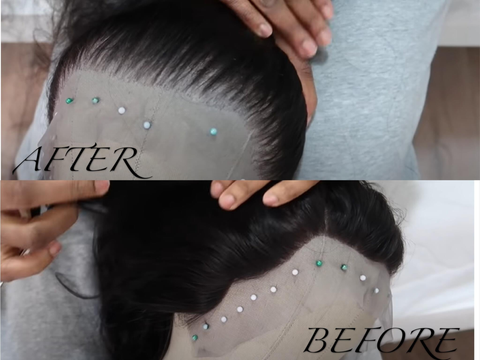
Introduce Ulash preplucked wigs
If you don’t want to go through all the trouble with plucking your own wig and taking the risk of plucking too much, there are pre-plucked wig available at Ulashwig. Ulash is a pioneer in the wig industry. Being innovative and fully in touch with the customer, Ulashwig was the first company that offered wigs pretreated. Pre-bleached knots, pre-sewn elastic bands, and pre-made fake scalps with no extra charge for your wig.
Buying a pre-plucked wig takes away the cons of plucking your own wig and you may be sure that the wig will not be plucked too much.Ulashwig uses a method that uses a special hand-tied approach, which helps the natural look and helps with never seeing the harsh line between your hairline and the back of the wig.